

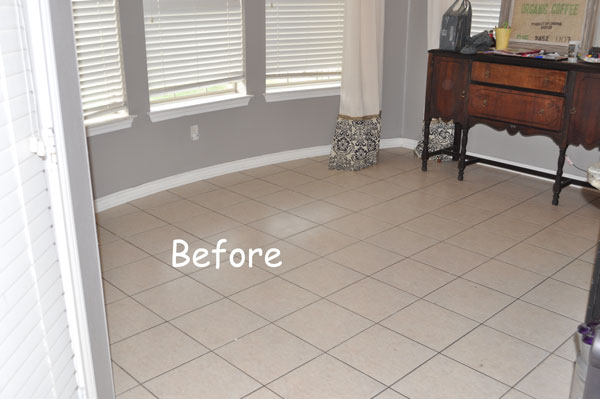
This is so long overdue, I know!! I shared on facebook sometime before Christmas that my ugly kitchen floor was all of a sudden popped up at four corners… It was right in front of the oven and the one cabinet I have unlocked so Mia can play with the stuff in it. I didn’t want my little princess to get hurt so we decided to rip up the whole floor. 
Now right about there you might be saying- you what? Yes, I had pneumonia and others were sickly too- but that wasn’t enough to stop the opportunity that was knocking!! There were only a couple of things about our house that I really didn’t like when we moved in!! I changed out the countertops, painted over all the horrible faux yellow walls, and painted the cabinets that had yellowed over the years. But the floor- the huge grout lines were so bad and the tile was always looking dirty. And in my house the kids and hubby know if the floors aren’t clean mama ain’t happy!! I mean everything else around me can be a train wreck but not my floors!! OCD?? Maybe a little, I do vacuum more than anyone I know. I love my Shark. But seriously cannot stand stepping on a crumb or toy or whatever!!
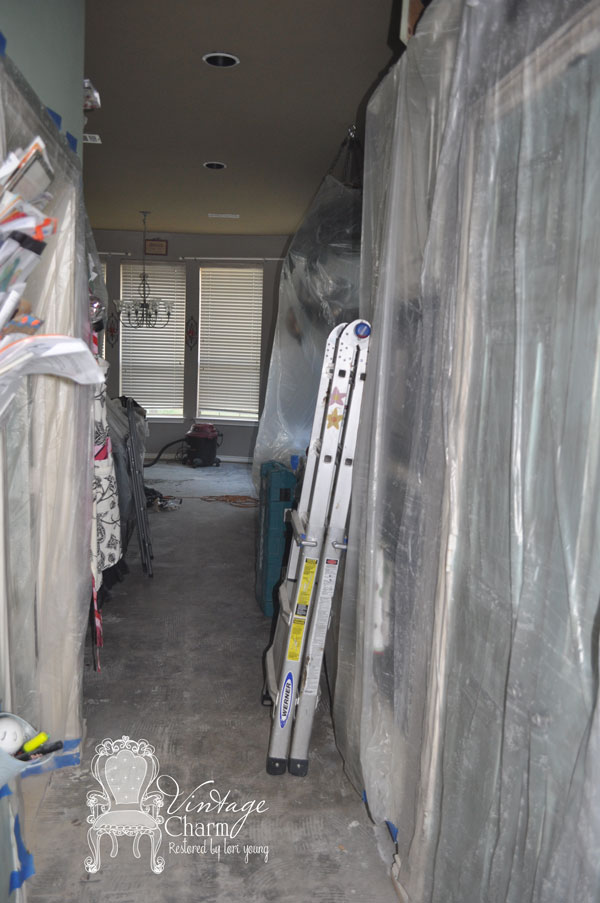
Anyway, I got lost there. Floor was coming up and we that day decided to just tackle it!! Where here’s the true whole story. Day 1 were those people you would sit on the couch with a bowl of popcorn and criticize or laugh {with us} over every last thing we did in the next 24 hours. I am not sure if it was lapse of judgment from being sick or what!! The first 20 or so tiles came up without any fight. I seriously began to wonder if the grout was the only thing keeping them down.. Then we hit an area that required a bit more push and shove so my husband went out and rented those wonderful tools and just got it all up. But here are a few tips we didn’t follow- I mean I was visibly upset but it was too late to go back and change what had been done at this point!!
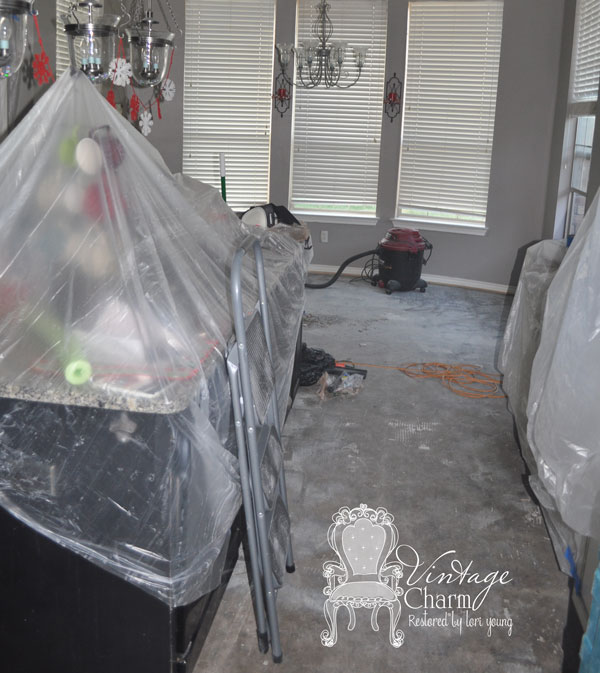
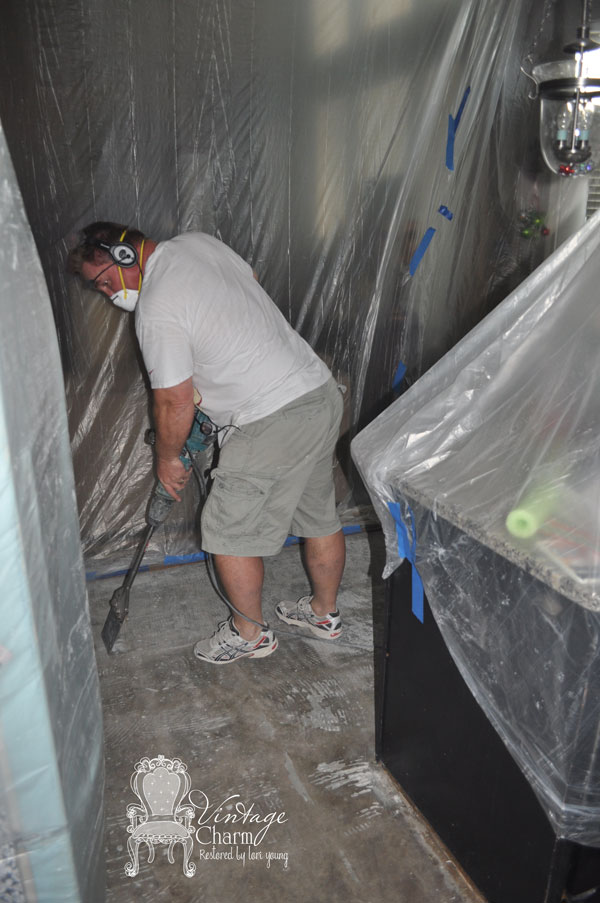
Put up that plastic and shield off the rest of your house from the tile DUST!! That stuff is vicious!! Did I mention I already had pneumonia?? And while you already have the tool get the mortar off the floor in the areas they actually used it!! Seriously some areas didn’t have any- not on floor or back of tile… Those are the areas I would walk over and know- one day this floor is coming up all on it’s own. Just be patient Lori!! {insert grinning smile}
We had only 3 short weeks until Christmas and we were taking up our weekends of fun and frolicking to play DIY- I could tell my kiddos weren’t having fun with it and I didn’t want to ruin the season so floors got put on hold!! I can tell you that my family from out of town sure enjoyed Christmas dinner and didn’t even mention the new look of the concrete floors!! {well they did but they were nice!!}
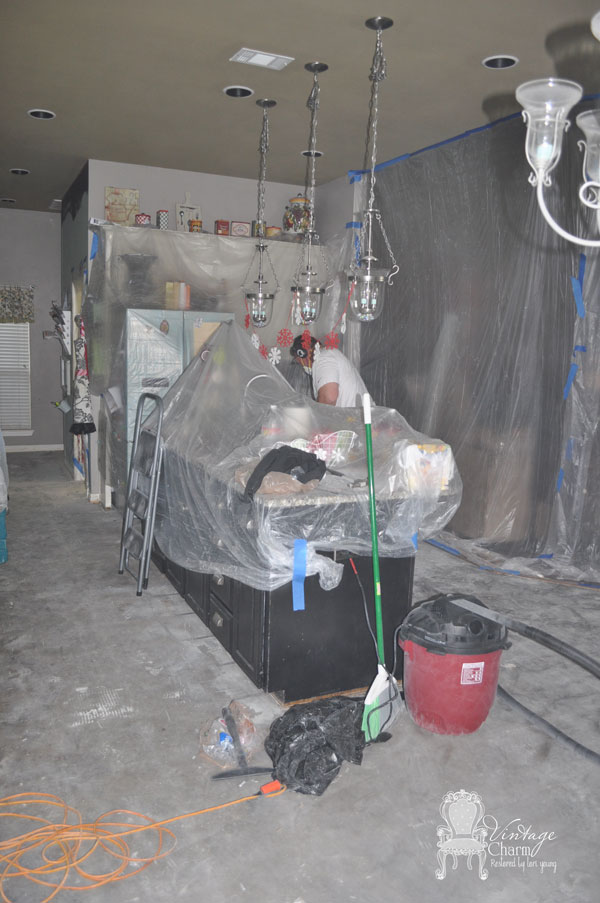
So after Christmas, we spent a weekend on hands and knees with chisel and hammer trying to get up the ridges of mortar left behind… After 6 hours of doing it the long hard {wrong} way, my husband went back and rent that tool with the blade and we got it all up in 35 minutes. Oh my aching back for NO reason!! Plastic was up and dust was contained!! Huge improvement from previous time!!
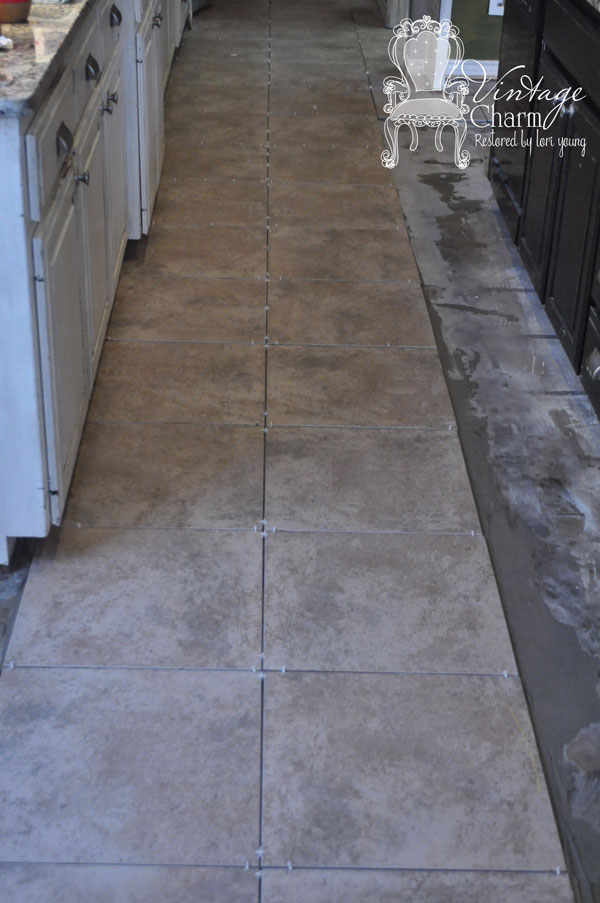
The hardest part was trying to decide whether to lay down the same hardwood flooring from the living room into the kitchen space or do a tile again. I wanted the wood but just wasn’t sure I wanted the wood. I love the way tile cleans up in a kitchen. I just couldn’t decide. We went to Home Depot and Lowes grabbed a few pieces and brought home. And then I decided let’s run to Second’s and Surplus and just see what they have too. Nothing previously that I had brought home was “it” so what could it hurt to throw more options in. I also wanted to talk myself into tile because the wood was lingering in the back of my mind. Cost being somewhat of an incentive I was excited to go look. Well can I tell you, their selection was huge. They had a lot of different options. I found one I loved but it wasn’t in that particular location- {I’m such an instant gratification gal} so I kept looking. I found what we ended up choosing it was such an easy decision. There was no price on it anywhere but I loved it was neutral, yet the movement that the pattern gave. It was smooth to touch- which is important for my little weeble-wobble girl. So a nice lady came up and I said this is the one we need 450 sq ft. But also, can you tell me how much?? 79 cents. yes just 79 cents. I am sure it’s not the top quality of all tiles but it was the size and colors I wanted and we brought it home that night!! Easy peasy and I was in love with everything about it!! Woohoo!!
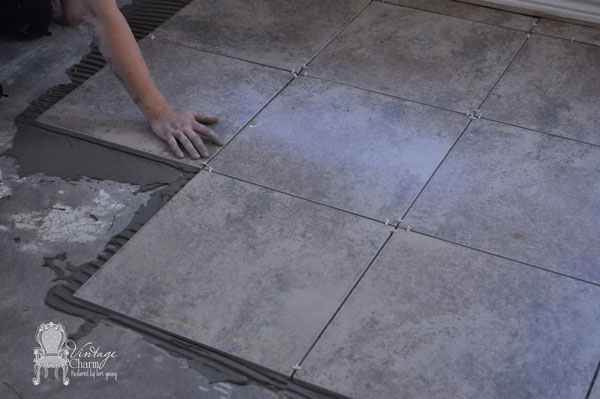
Determined that Saturday we could make it all happen and I went for it!! My husband got the tile cutter and I put the ever so lovely knee pads on and a tiling I went!! It was more work on my body than painting out 50 pieces could have ever been… I was reminded that I am officially 40!! { it does get easier if I say that over and over…}
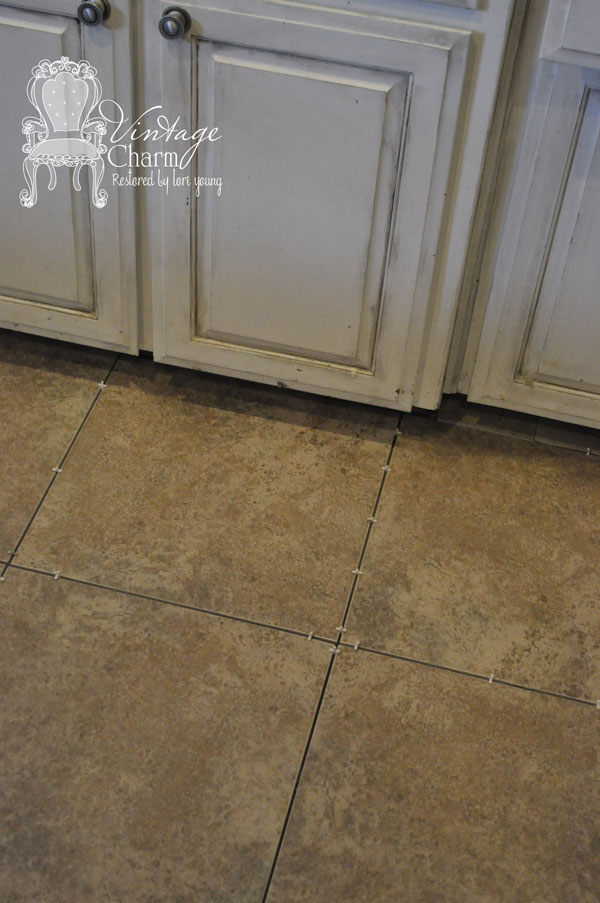
We didn’t have any leveling issues to deal with and the floor was clean and ready to go. I laid the first row of tiles, then the second and worked my way around the whole space.
I was literally on my hands and knees for three full days… And I thought 4 hours with the tile cutter would be plenty!! Haha!!
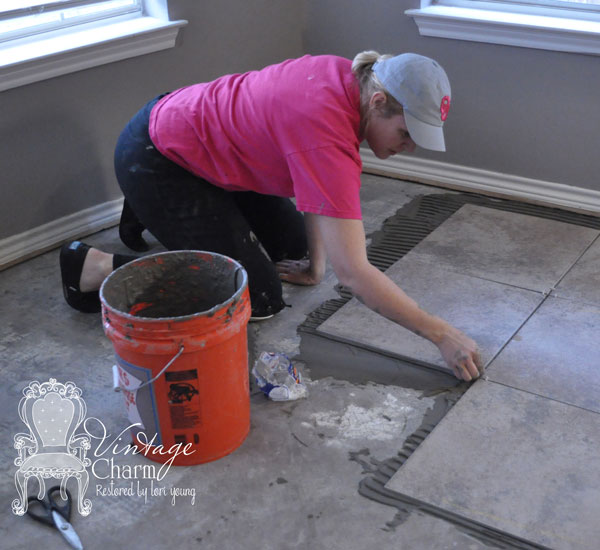
My daughter snapped this picture of me of working… note the odd positioning of the left wrist- man that hurt later!! I apparently held myself up like that for 3 days.
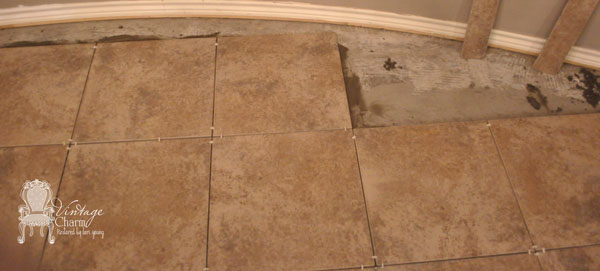
Oh how fun the work began to be when all we had left to tile were the odd pieces of the bay window and the transition area into the living room. It was my scrapbooking mind that made that job a little easier. I literally laid down carpenters paper and traced the empty space and we flipped it over to make a template on the back side of the tile. Who needs math?? You all do children don’t listen to mommy on that one!!
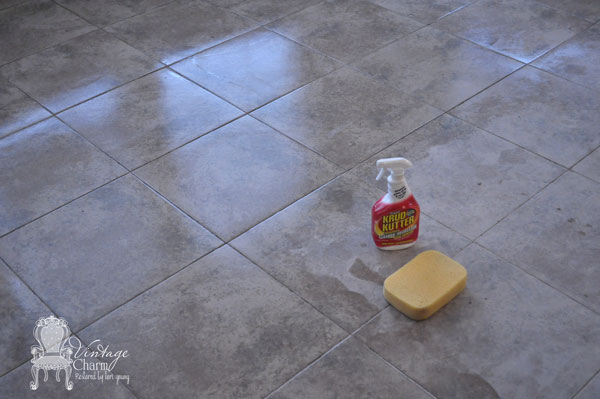 So after grouting and another round of being on my hands and knees, I thought I couldn’t bare another squat or another round… but that dang haze was a pain {seriously a pain}!! I did about 3 rounds of wiping off with water the day after it dried completely- any sooner you will be wiping wet grout {not good}. Then I loved Krud Kutter for the next 2 rounds. I sprayed it and wiped it- it came back a couple of hours later- I did it again. It did come back but less that time. So in all my love for BING and Google- I searched.. and I found someone who said that walking around with socks was the best way… and you know what they were right. I walked around for it the next week with fuzzy socks and it pulled up the rest!! So, I love my floors but man I will NEVER take on such a large project myself again. So, remind me when I bring it up again!! I have been caulking and painting the trim, and one day when life doesn’t look like a bomb in that kitchen I’ll snap a new picture of how pretty that floor looks!! I do love it. It compliments my wall color and the cabinets so well!! Love it!!
Thanks for stopping in!! I have a table and all the steps to do it coming to you soon!! Almost finished!! So come back!!


Wow — love the colors of the tile. We did ours ourselves as well and man I can say I FEEL your back pain! Or at least I remember what that felt like! Great job!!!
Aww thank you!! I am happy to only remember the pain!! I tell you it whipped my body back into shape… I told my husband if I did this everyday I’d not have any thighs left to lose!! 🙂 Have a great weekend!! ~ Lori
The tile looks really nice, I’m sure the after photos are going to be beautiful! You are making me cringe though. I don’t want to lay a floor anytime soon!
Wow!! You are one brave girl!! It looks really nice!! My hubby and I have done this together, as well, in our entire basement, which is our entertainment area with a pub room, pool table area, bar area, media room, and home office; about 1,400 sq. ft. We laid slate tile in most of it and some beautiful laminate that looks like hardwood in the pub room & pool table area. A lot of work, but a lot from satisfaction doing it ourselves!!
I read this to my husband and we had to laugh. We have taken on our front room and laid tile. I am so tired of looking at tile. We eventually threw in the towel and hired someone to do the grouting for us. We are battling the haze now. Trying to find ways to get rid of it. Love the sock idea. Thanks for your words.
[…] and there’s the little fact, I have taken up tile before. We redid our floors in the kitchen in our McKinney house and I wish I had thought to stencil them then!! I would have saved myself […]