

First, I know you have to be asking what is Glacage? And then why do I want to use it? I want to help answer that!!

I first want to say, I am a hands on visual learner… so whenever I can take a class to learn these things I will!! I do teach classes and I am thankful for those who come and soak in all they can!! But I do know that many of you live where we don’t have retailers yet and you want to get your hands on this stuff and want to know how to use it!! So, I pulled out a little table and I am going to try and explain to you in pictures and written format to use it!! I fear the video’s- sorry guys… I think I would be a dork!! There I said it!!
This is directly from the Maison Blanche Paint website:
Glacage Embossing Crème is a furniture refinishing texture medium used to transform furniture and cabinetry into fantastic custom creations. Glacage is an acrylic, water-based, thick texturing cream that mimics the look and feel of intricately carved wood. Create beautiful textured finishes over wood, cabinetry, and previously painted furniture.
Glacage can be applied directly to raw wood pieces. For previously painted surfaces, lightly sand surface or prime prior to applying Glacage. You may add water to thin Glacage if desired.
Spread luxuriously creamy Glacage through a stencil to create a raised design or apply allover for a textured look. A variety of tools can be used to apply Glacage including trowel, off set knife, sea sponge, spatula, putty knives, and paint brush. Soap and water cleanup!
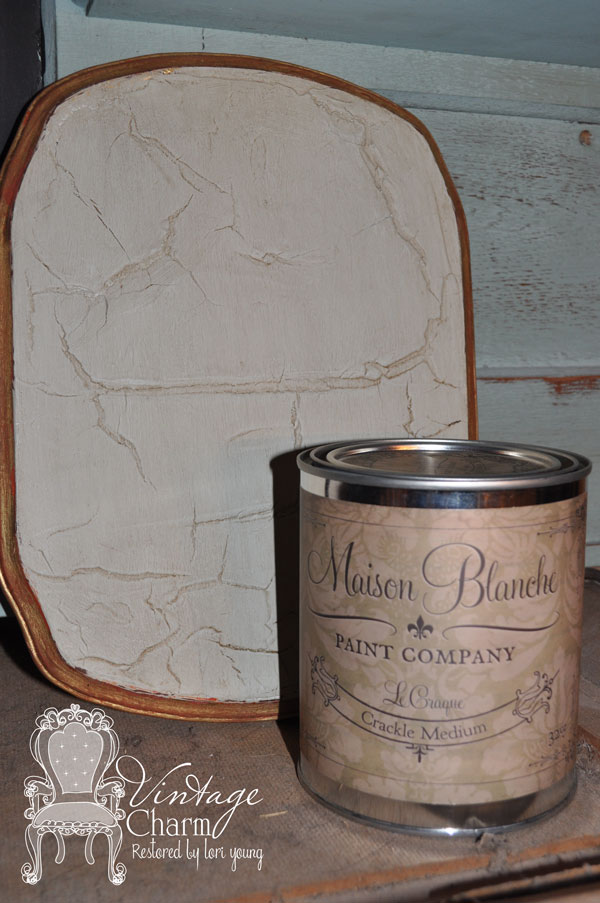
To Use: For a crackled effect, apply Le Craque crackling medium and allow it to dry prior to applying Glacage. Cracks will appear as the Glacage dries. Cracks will also naturally occur where Glacage is applied in a thick manner or when drying is accelerated with heat.
Allow Glacage to dry completely, sand away any imperfections, and paint with La Craie Furniture Paint. Protect your finish with Antique wax or polyurethane.
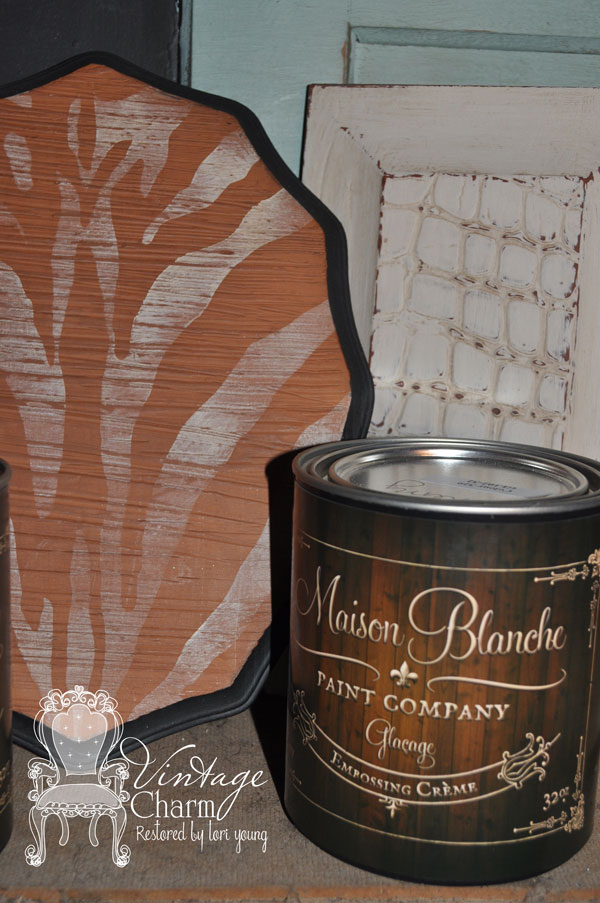
Glacage is available in 5 shades: Natural, Oak, Cherry, Walnut, and Black
Today I am showing you Walnut.
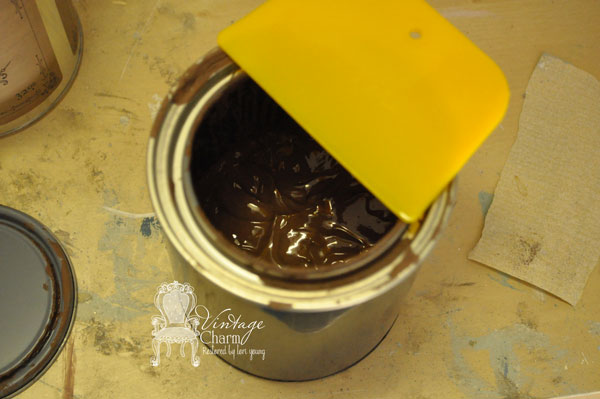
I got the little tool from Harbor Freight they come in a handy little 3 pack. You could also use an old gift card anything with a straight hard edge.
Here you can see, that this is all the Glacage that I will use to do this stencil.. but really I want you to see that the consistency is much like a thick pudding. The amount used is very little when doing it with a stencil. And the depth of your stencil will dictate the amount used and produce/create a larger or smaller raised texture. When using it alone it is very smooth when dried.
Before you begin- base coat your piece with the color you desire. Here I based it out in Magnolia.
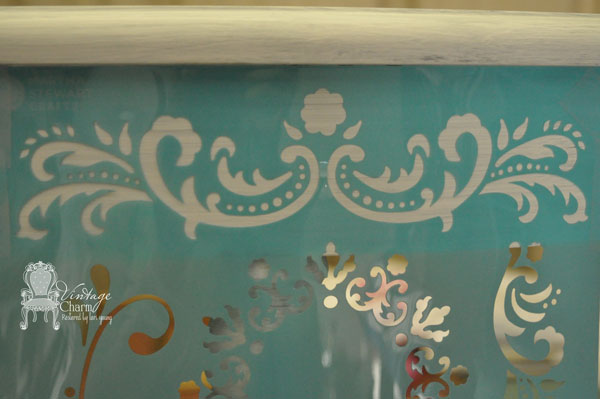
Here I am using a thinner Martha Stewart stencil. I was in the middle of another project but knew the need was great on how to use this {lots of emails…} so I am sharing all the don’ts as well!! I didn’t know where my spay adhesive was at the time and lacked the time and will to find it- so I taped it with scotch tape no less. Yes I did. This doesn’t allow the stencil to lay completely flat, especially when it is on a vertical surface… So- use a spray adhesive!!
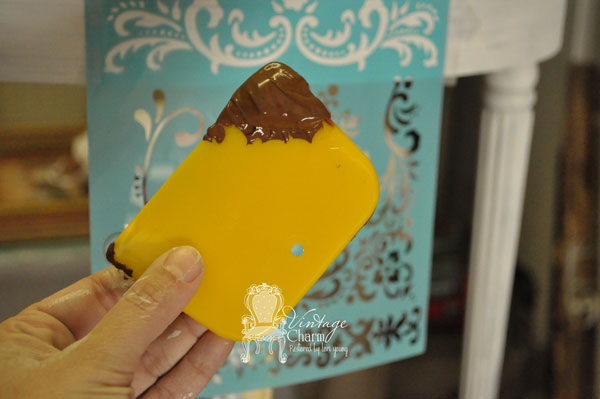
The dollop of glacage above was put on initially and this is at a slight angle (between 30-40 degrees) as to press down enough to get into the recessed area but mostly over the stencil. {this also creates seepage under the stencil if adhesive isn’t used.}
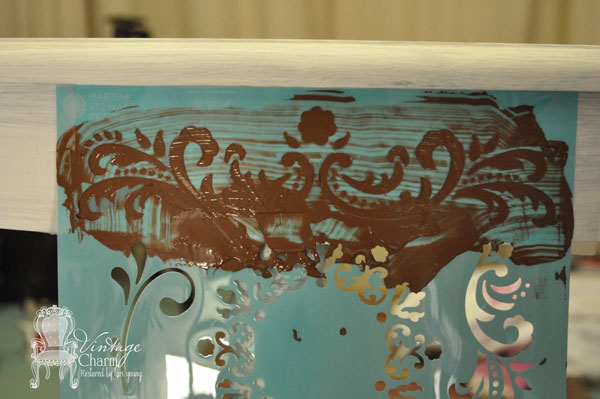
The less amount of strokes you use to touch the product the best!! So this is one final scrape over at the same angle, but not as much pressure, to take off too much excess!! I do suggest playing with this so you can get a feel of your strength and technique needed on a sample board… or even a piece of cardstock!!
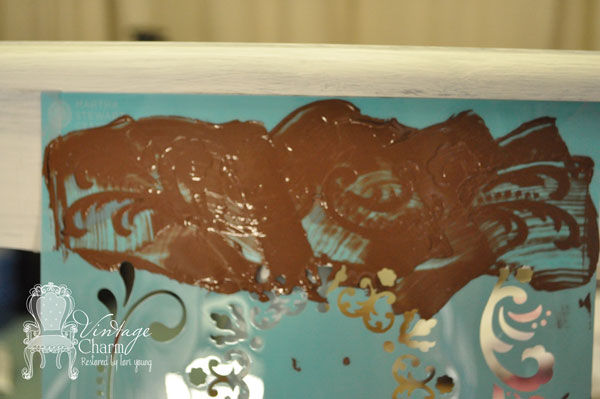
Here you can see that the glacage did seep under the stencil- but it’s okay!! It’s just a light amount and it’s not raised… You will see in the end result that it doesn’t show!! So, if this happens- it’s all good!! You can also see the depth of the texture is minimal because of the thin stencil. But I wanted you to see that you can use the thinner stencils.
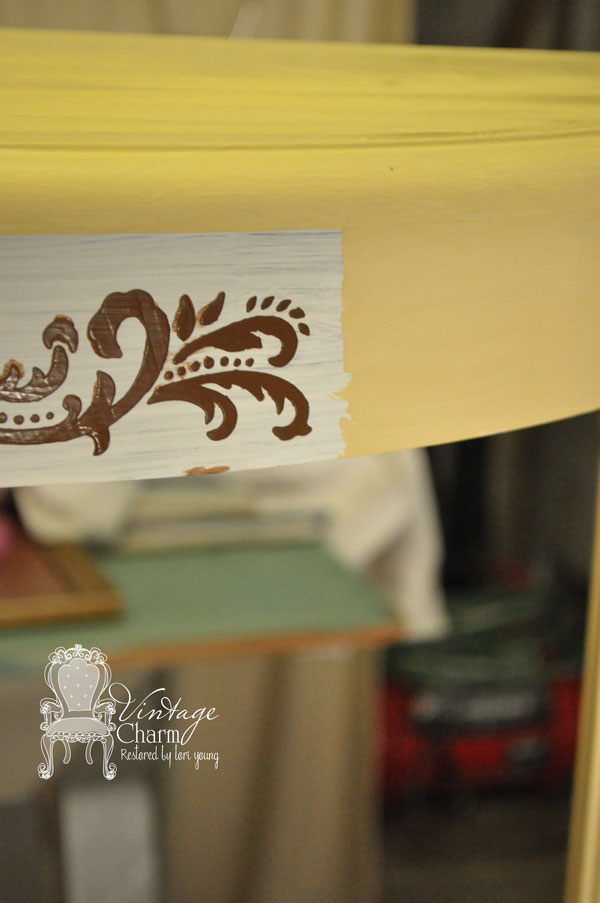
I went ahead and painted the table with my second color {La Craie Miel} all around but the spot of glacage- it will need to dry overnight to get the maximum cure!! It’s a muddy mess if you don’t let it dry overnight {said the girl who tried one time to rush the process}!!
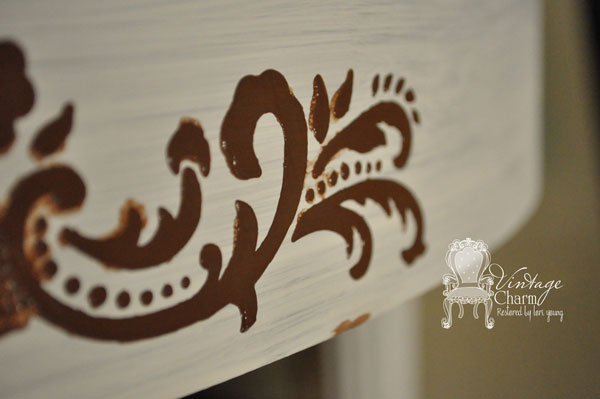
And finally you can see the end results!! I love using this stuff!! It is amazingly fun to play with and adds that little extra touch to your projects!! I want to also say it amazing in filling in spots where the veneer has failed and you don’t want to peel the rest off or go with the age of the piece!! It dries to a hard finish and is wonderful in those tough spots!!
Below the zebra is done in oak and dragging a wallpaper brush over it to provide the texture. When dried use a stencil to paint the zebra over and used dark wax to age the stenciling. The other one is done painting the glacage around the edges {raw natural wood drawer front} and stenciling the raised part using the glacage. Painting an all over coat of Silver Mink and sanding the raised edges to reveal the wood look- finished off with our dark wax only.
Glacage is just like the paint it will crackle if applied to heavily!! So know that going in. If that is the look you are going for apply a little heavier and hit it with a drier or try using our Le Craque underneath to give a beautiful crackle finish.
I hope that helps!! It’s so fun to play with new things- so have fun!!


THANK YOU SO MUCH for such an excellent tutorial. There was some product years ago that was used over a stencil, some kind of creme. I still have some of the stencils and the tools used to spread the creme into the stencils. Good to know there’s something else used now. Having such a great tutorial helps so much. I’m a person that needs to see how something is used, can’t just read something and “get it”. What type personality is that? A or B?
I have a notebook I keep the techniques I’ve printed out and refer back to them often, so helpful. Happy Days
Thanks so much for the great tips. I bought a can of this on a whim while visiting relatives and I can’t wait to use it.
Traci
Be sure to share what you do with it!! I love seeing what others come up with!! Hope you had a great visit with your family!! Enjoy your day!! ~ Lori
Did yu know that something very similar can be done using a stencil and either spackle or joint compound? I did a tree in my hallway and it was quick and easy. The website to get the stencil is VictoriaLarsen.com.
Thank you Elaine. I bet this did work!! I think that’s is a great way to create the look. The benefits of our Glacage are the colors that it comes in… So when sanding back you get the feel it was a piece of the wood!! Thank you for sharing!!
WOW amazing, thank you for your tutorial, it was so easy to follow. I would really love to try some of this cream but dont think it is in Australia. We just dont have the products you have. Is there anything else that you would know of that I could use to do the same job?
Thank you,
Amanda
Loved the technique you showed us! This looks like a great product. Never having done this before, I’m wondering how you got to the final result.
After the Glacage dried, did you continue painting the yellow (La Craie Miel) over the new design, then paint your base over the yellow and sand it back as needed for effect?
Thanks!
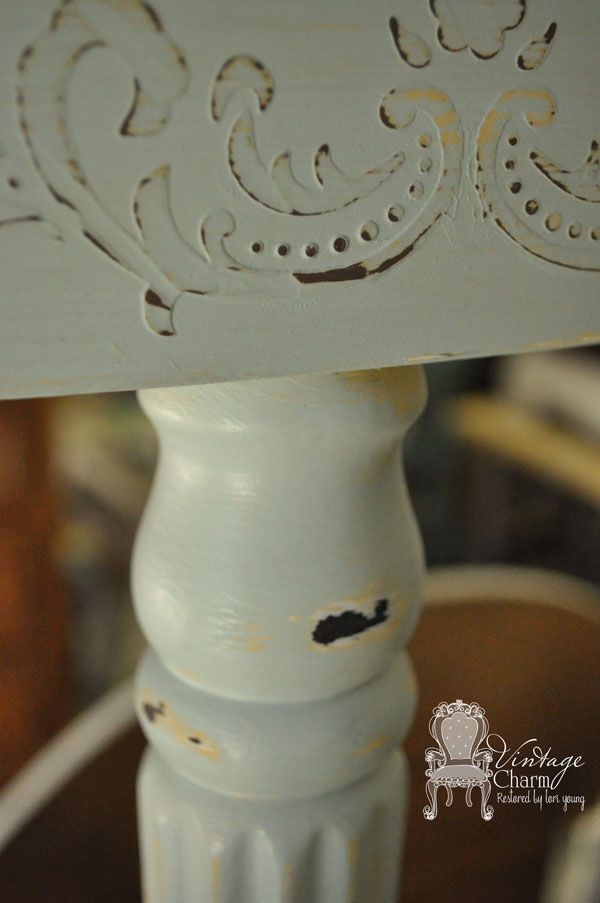
Thank you Julie… I did continue painting over the raised area with the yellow and then my final color. Sanding back gently in the areas that I wanted the new walnut to show through and showing each layer of color as well!! The top color is actually Valspar’s Tranquility. And is protected with Minwax’s Wipe On Poly!!
I love this! Found your post on Home Talk. I just moved into a retail shop space about a month ago and have been busy redesigning furniture to stock the store with. I am going to try this technique for sure! It’s gorgeous!
Wonderful Lisa!! Welcome~~ I hope your new space is a great success!! This is a fun technique and product to use!! Blessings, Lori
I couldn’t figure out what this product did till I saw your tutorial so thanks a bunch! You make it look so easy and your project turned out amazing. I can’t wait to try this stuff!